 Step 3: Apply Some Layer Styles
Here's where it starts to get fun!
Double-click on your new 'Buttons' layer in the Layers palette. This should
bring up the Layer Styles dialog, but if it doesn't you can always
display the dialog with the 'Layer > Layer Style' menu item.
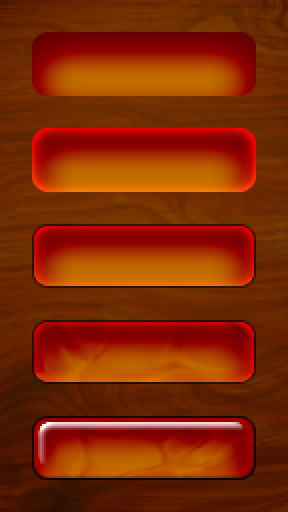
My tortoise shell buttons use a combination of five layer styles. That's it!
In the first image to the left you can see the effect of each additional style
as it's applied. The styles I'm adding are, in order:
• Inner Shadow
Step 3: Apply Some Layer Styles
Here's where it starts to get fun!
Double-click on your new 'Buttons' layer in the Layers palette. This should
bring up the Layer Styles dialog, but if it doesn't you can always
display the dialog with the 'Layer > Layer Style' menu item.
My tortoise shell buttons use a combination of five layer styles. That's it!
In the first image to the left you can see the effect of each additional style
as it's applied. The styles I'm adding are, in order:
• Inner Shadow
• Inner Glow
• Stroke
• Pattern Overlay
• Bevel & Emboss with a
Contour
Click on the style names to bring up a window showing the exact settings
I've used for each layer style. Remember, you have a lot of flexibility when
tweaking these style settings, and now is when you should experiment a bit.
Change bevel widths, glow colors, blend modes, softness values, curves, the
direction the light is shining... there's a ton of knobs to twiddle!
One of my favorite blend modes is 'Color Burn', which darkens a color in
interesting ways. That's how I take an amber colored button and cause the
dark areas to drop to the deep reds seen here. Using 'Color Dodge' does the
opposite, lightening within a range of color... that's why the inner glow
looks bright red even though I'm using white for the glow itself. One big
advantage of using burn and dogde instead of hand-picking matching shadow and
glow colors is that you can change the color of the underlying button without
touching anything else... and it still looks great. Try changing the color of
the button vectors, and see for yourself!
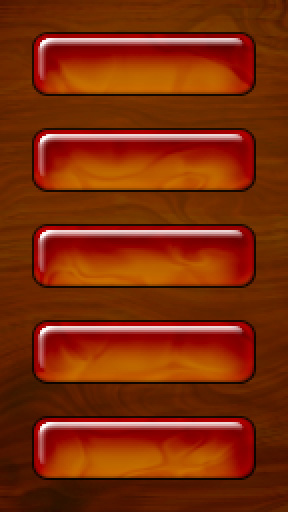
In the second example I've applied all of the layer styles to each button, so
you can see what it looks like. They're almost complete!
<< Previous Page
Next Page >>